
Placing Mechanical Tees and Taps
Placing Mechanical Tees and Taps in Revit can be frustrating. Here are a few techniques that we’ve come up with to place these fittings with ease. Both of the techniques will use tools found in the Victaulic Tools for Revit Ribbon. We’ll use the Tap Creator and the Content Ribbon to provide two different rock-solid workflows to help ease the pain of drawing taps.
Using the Tap Creator
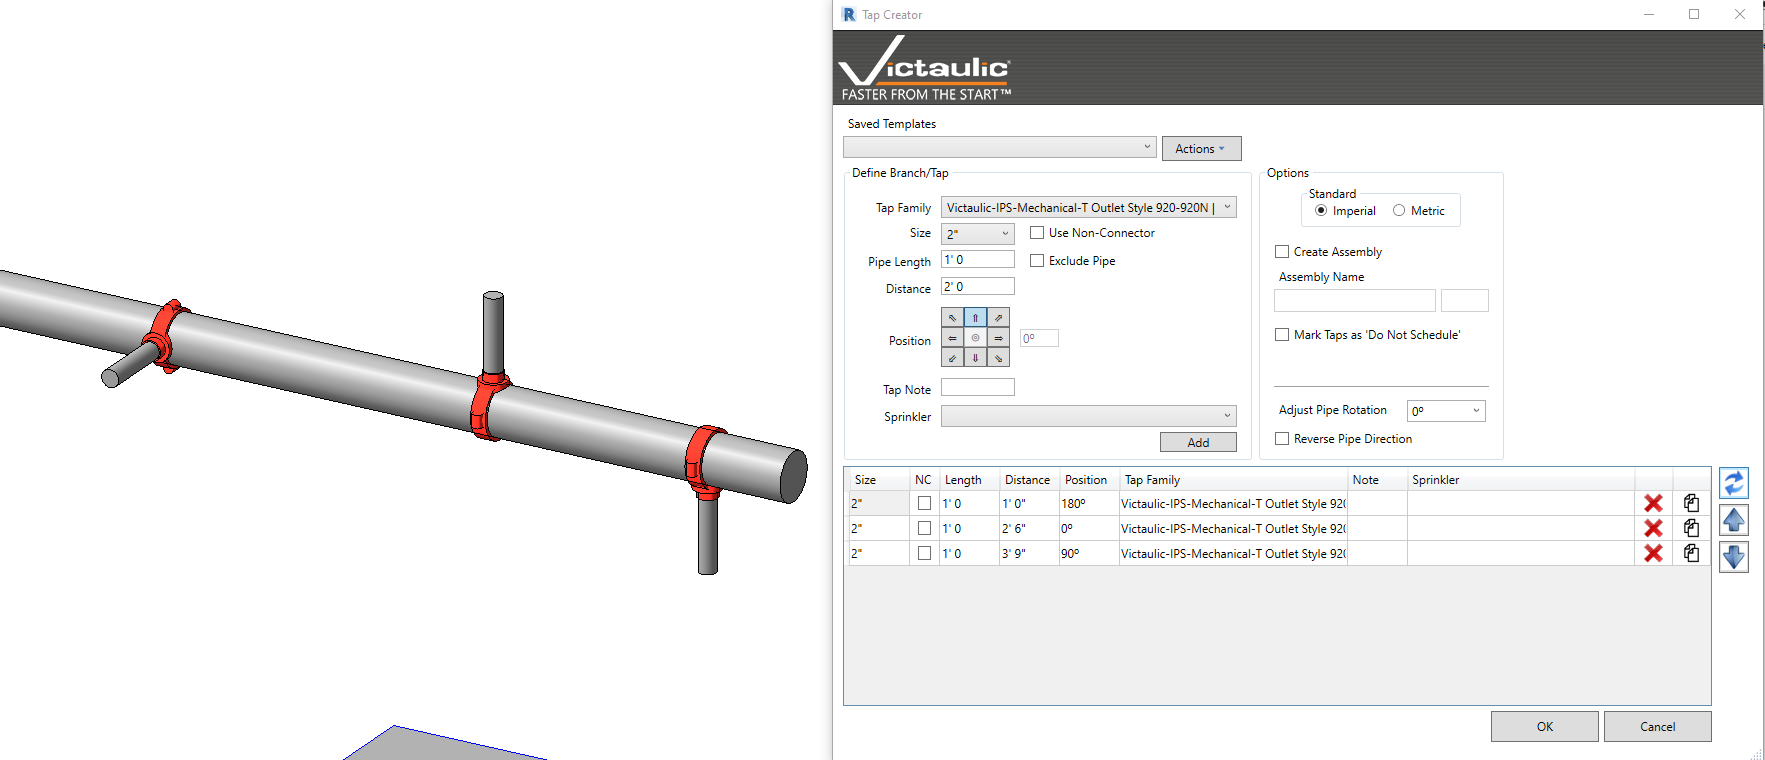
The Tap Creator tool is intended to expedite the placement of Taps and give you control over the location of placement. This control includes the distance from the end of the pipe and the rotation around the pipe. Using this database-driven tool, you would add records to a table and watch as Revit creates the taps in the background by your direction.
- Click the Pipe where you want to add Taps or Mechanical tees. (You can select multiple pipes and set up identical configurations simultaneously.)
- Open the Tap Creator from the Productivity Tools section of the Victaulic Tools Ribbon.
- Select the Tap Family from the drop-down at the top
- Select the Size, Length, Distance, and Position and click Add. Note: Tap Families are limited to size and product availability. Therefore, some size combinations may not be available for Mechanical Tees. This is noted by “Custom Fitting was created” messages.
- Add more or duplicate lines to attain your desired configuration.
- Optionally, save your configuration as a template to be recalled later.
- Click OK to finish the command.
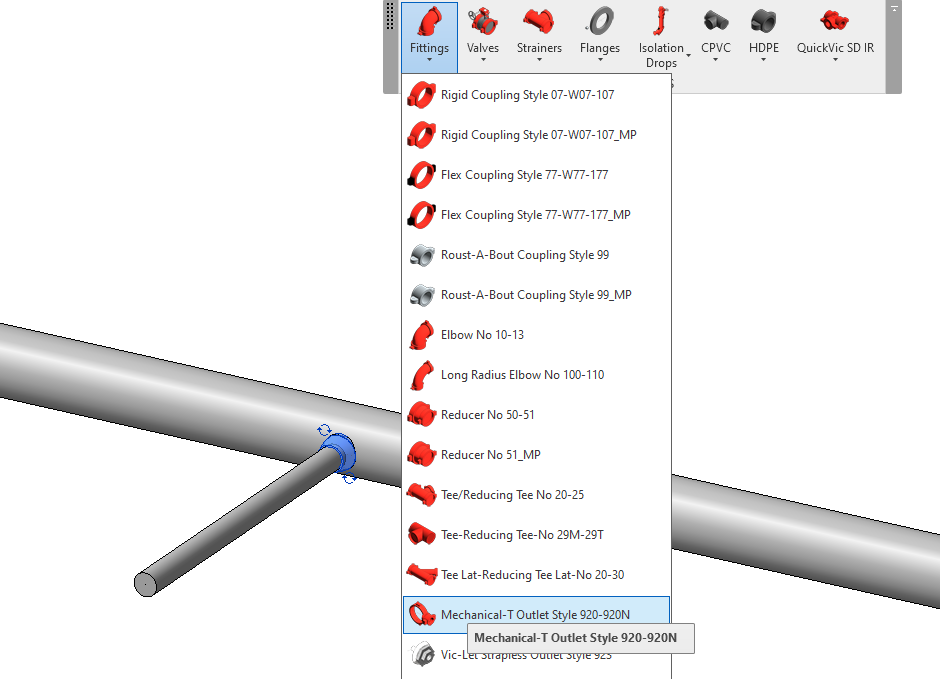
Using the Content Ribbon
The Content Ribbon, including the User Toolbar, contains more intelligence than just loading fittings into your model. If there is nothing selected in your model, the Content Ribbon buttons will load the selected Family and prompt you to place it in your model. If you have anything selected, the Content Ribbon will examine your selection and if it finds a matching Part Type, it will switch the family for the one you selected.
This means that if you were to place Taps on your pipe lengths using standard Revit tools, you can switch out the taps using the Victaulic Content Ribbon. It should be noted that Revit will not allow changing of Tap families using the Properties window and standard techniques.
Here are the steps for this technique:
- Draw a standard tap or find one in your model.
- Highlight that previously placed tap and open the Victaulic Content Ribbon.
- Select the Tap family you’ll like to place.
The selected Tap will now be changed out to the new fitting.
Hopefully, you’ve found these tools helpful in placing Taps and Mechanical Tees. We’re constantly improving our tools to combat these Revit specific challenges.
Pro Tip:
If the tap family you’re looking for is not available in the Victaulic Content Ribbon, you can add it to the User Toolbar and use the same technique to place your own custom fittings.