
Spool Annotation Tags Don’t Show Mark Numbers
The first time using Victaulic Tools for Revit Spooling Tools within a project can produce undesired results when it comes to annotation tags. This guide will help you understand all the configurations necessary to get reliably placed and numbered annotation tags in your Spool Assembly Views.
It should be noted that the tag selection for Assembly Spool detailing is determined by the Custom Tagging tool of Victaulic Tools for Revit. We’ll go into more detail below about this.
The Victaulic Assembly Manager will instruct Revit to create sheets, views, annotations, and bills of material based on elements that are already in your project. When any part of this fails, it is typically due to an expected item, such as an Annotation Tag or a Schedule Template not being present in your project. That said, in the situation where the tags shown on an Assembly view are seemingly random, like you see below, your first stop should be the Project Maintenance tool.

The Project Maintenance Tool
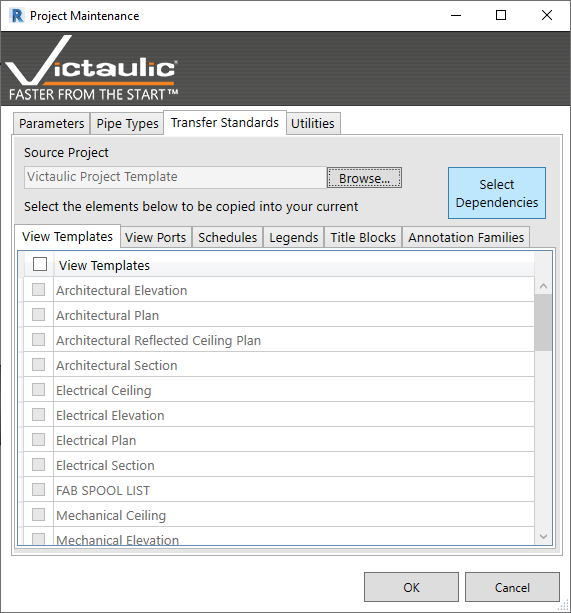
The Project Maintenance Tool contains tools for managing Parameters, Importing and Saving Pipe Types, Transferring elements from project to project, and other Utilities to help manage a project. We’ll be looking at the Transfer Standards tab. This is where you can pick specific elements to pull from any other project or template file. By default, it will show the elements present in the Victaulic Project Template, but using the Browse… button, you can select a previous project or your own project template to read from.
Next, select the elements from any of the View Templates, View Ports, Schedules, Legends, Title Blocks, or Annotation Families tabs. Items that show up in gray are already present in your model. Alternatively, use the Select Dependencies button to automatically select any element in all of the tabs that is previously specified in the Victaulic Tools settings. This can be a huge time saver when setting up a new project.
Custom Tagging
After the missing elements are loaded into your current project using the Project Maintenance Tool, they will need to be checked and/or specified in the Custom Tagging Tool to be used properly during Spool Detailing. Open any view that contains the categories you’d like to tag. Custom Tagging will only show you categories that are present in your view. Be sure to have User Defined Group 1 highlighted for this as it is designated for Spool Tagging. Select the desired tag that corresponds with the Category. For example, Pipe Fittings will need Pipe Fitting Tags and Pipes will need Pipe Tags.
Because the Custom Tagging tool is meant to expedite tag placement, when you click OK, you’ll be prompted to place tags. We will click OK to save the settings and immediately escape out of the command using the Escape key on your keyboard. Now, when you see the form again, click Close.

Assembly Manager
Now that we’ve confirmed the annotation tags are configured properly, we can try detailing our sheets one more time with the Assembly Manager. Select the Assembly from the list, select your Spool Template, and click the GO button. The placed tags should follow the rules of the Custom Tagging tool and display properly.
